If you’re managing your investments through both E*TRADE’s website and the Power E*TRADE platform, having access to your trade history is essential. This article is designed to guide you through the process of exporting your trade data from both platforms.
Whether you’re using the classic E*TRADE website or the more advanced Power E*TRADE interface, we’ll walk you through each step—from navigating to the right page, selecting the appropriate time frame, to finally downloading your trading activity.
Download Trade History from Power E*Trade
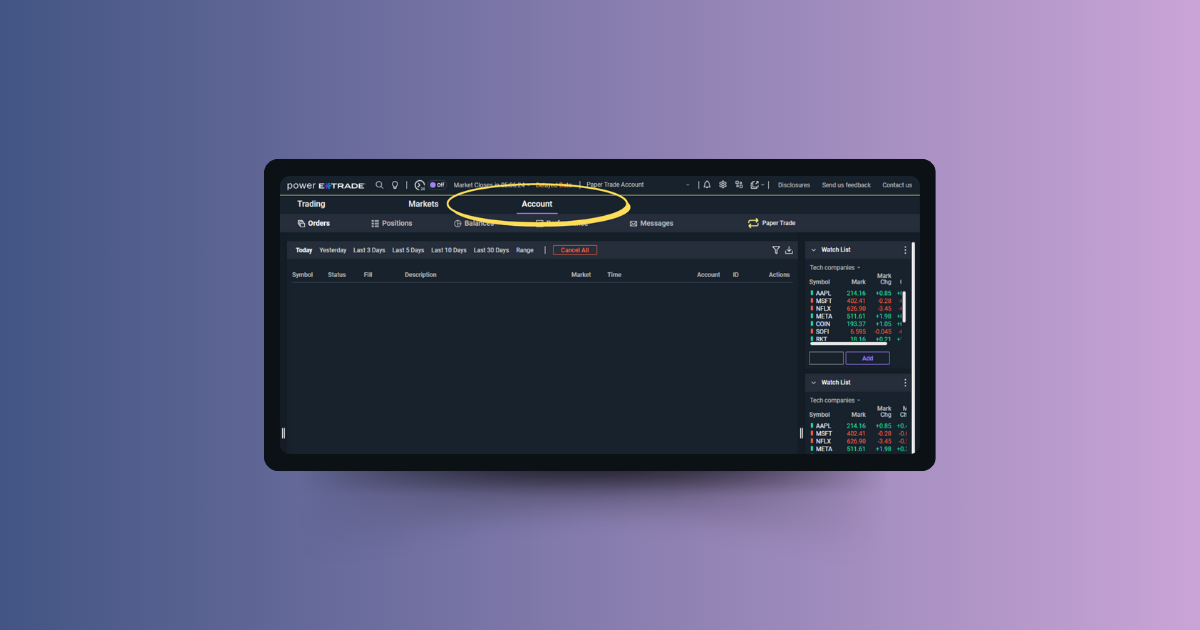
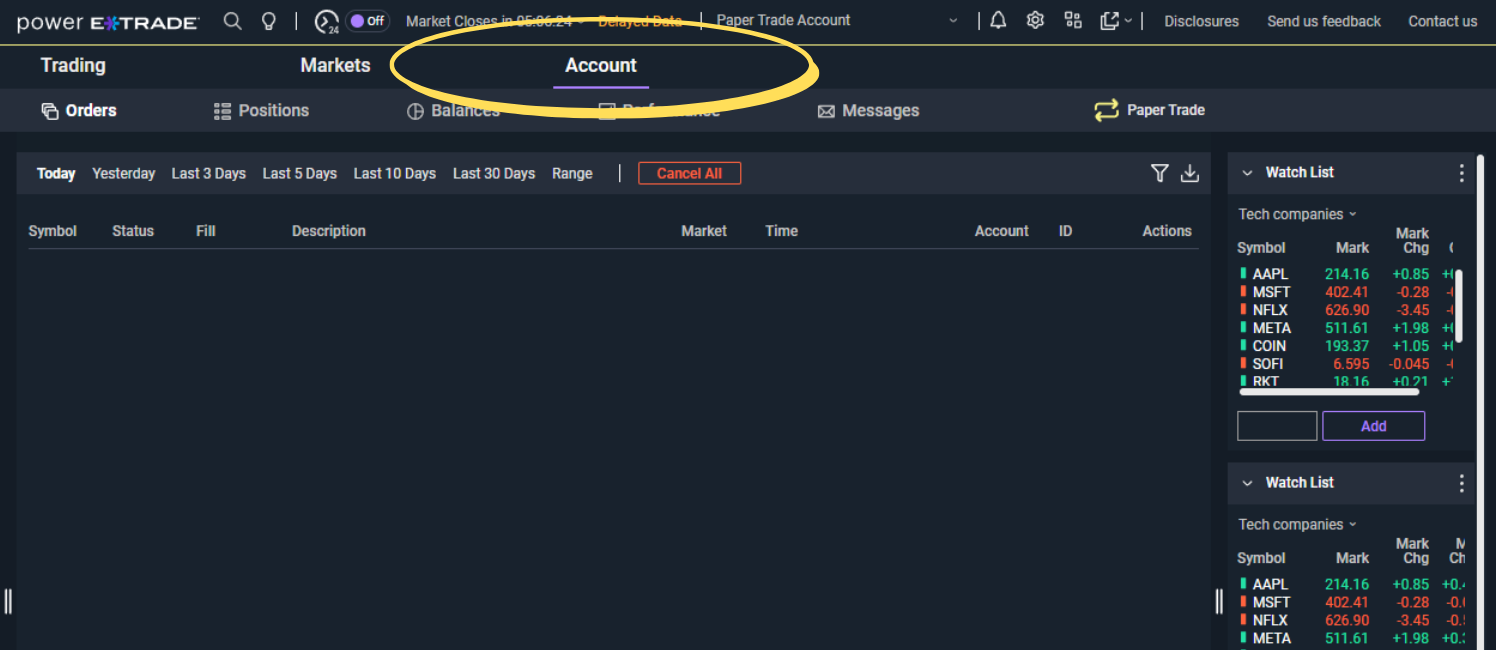
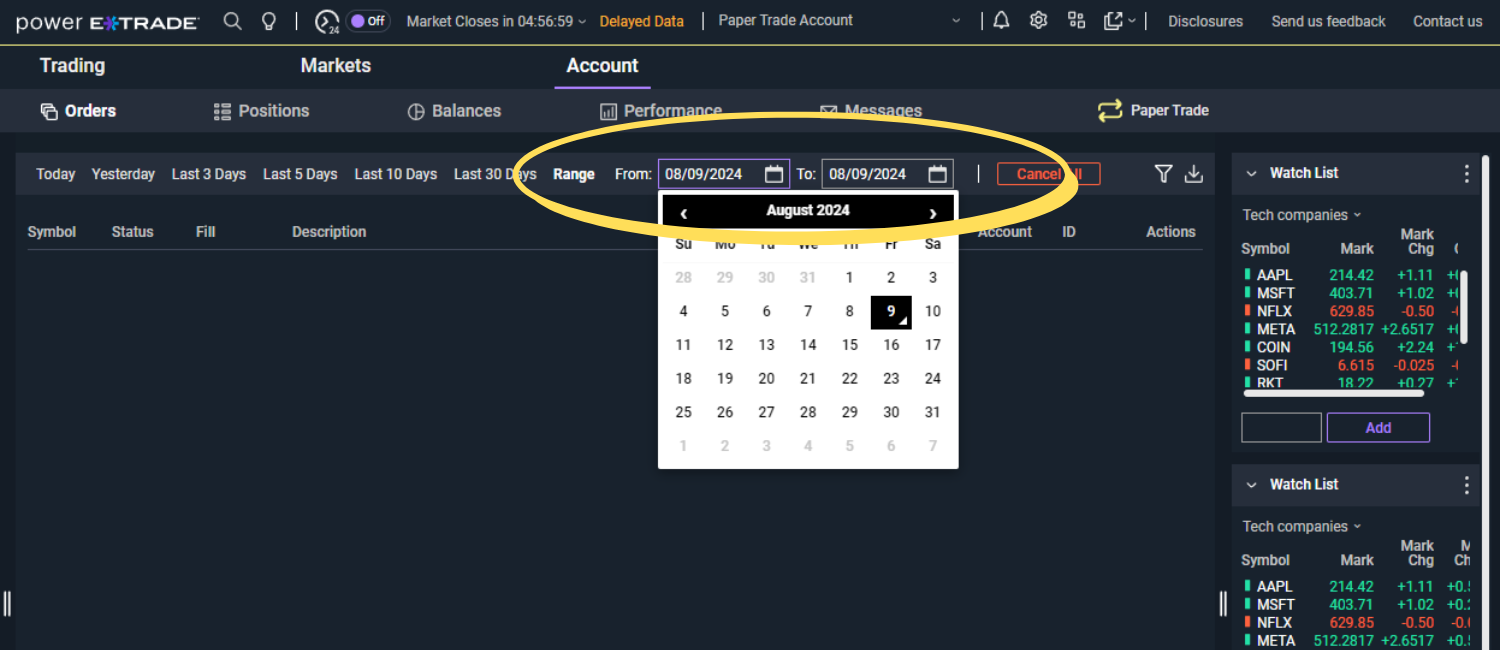
You’ll first need to navigate to the Account tab and then open the Orders page. This page provides a detailed breakdown of your trading history, including all executed trades, orders, and account transactions. Typically, the page defaults to only showing data for the past day, but can be adjusted to any time frame using the Range button.
Here’s a breakdown of what you can expect to see on the Account page:
- Executed Trades: A list of all trades that have been executed, including details like the date, time, symbol, quantity, price, and order type.
- Open and Closed Positions: Information about your positions, showing what you currently hold and what has been closed out.
- Cash Transactions: Records of deposits, withdrawals, and any other cash-related transactions.
- Account Balances: A summary of your account balances, giving you a snapshot of your financial status.
2. Select Time Frame
Once you’re on the Activity tab, the next step is to select the right time frame for the data you want to export. Here’s how to do that:
- Locate the Time Frame Selector: Near the top of the Activity tab, you’ll find a time frame selector. This tool lets you filter the data by specific dates.
- Select a Predefined Time Frame: You can choose from predefined time frames like “Today,” “This Week,” “This Month,” or “Year-to-Date” if you need a quick and easy option.
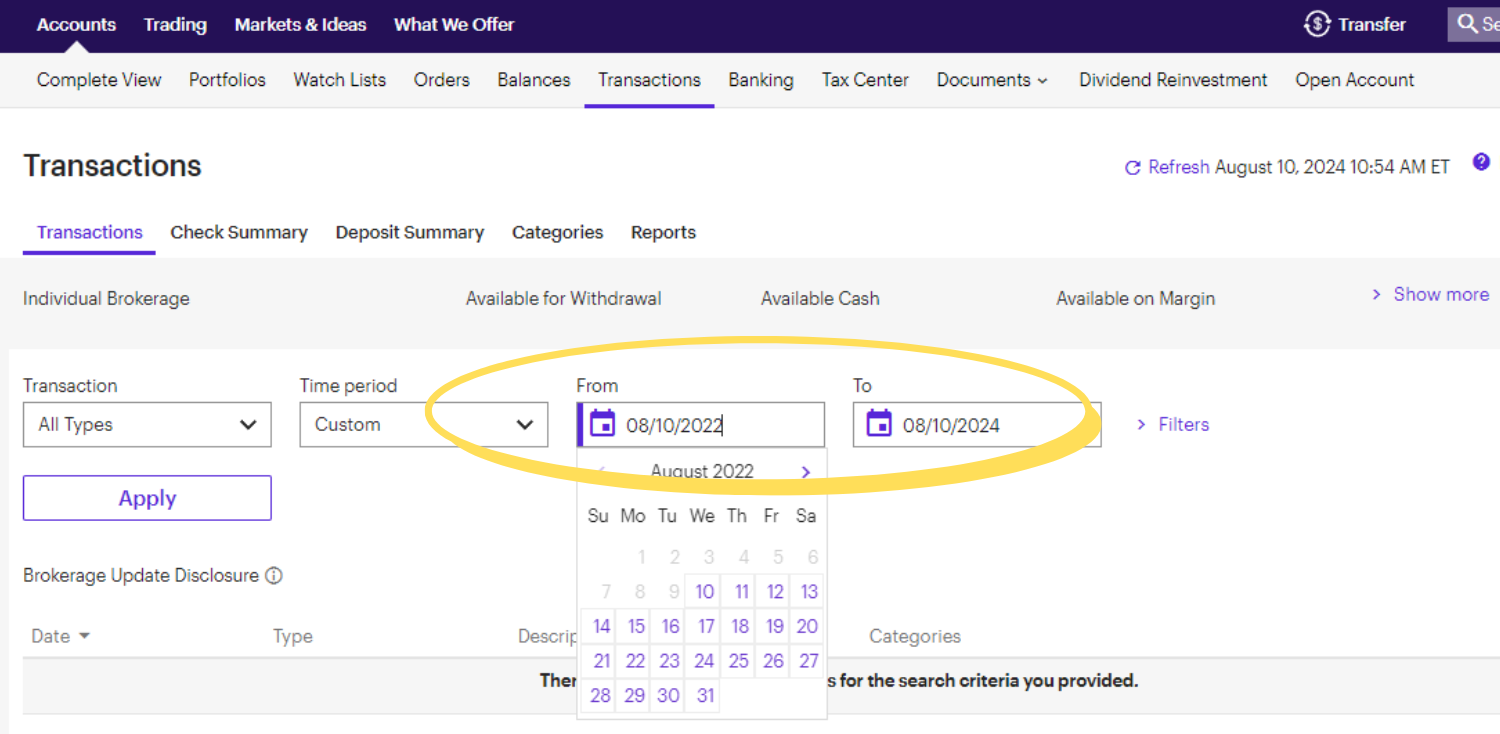
- Set a Custom Date Range: If the predefined options don’t match what you need, select a custom date range by clicking on the calendar icons to pick your start and end dates.
3. Export to File
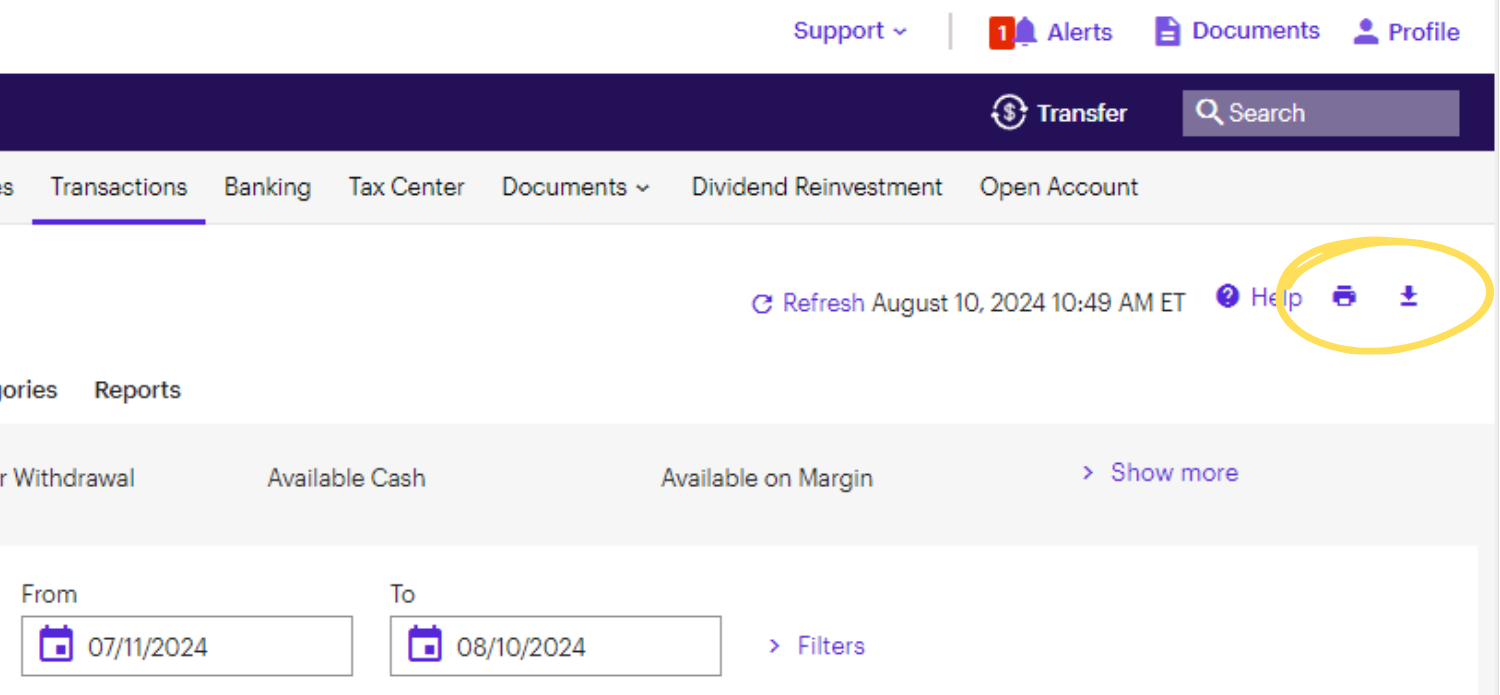
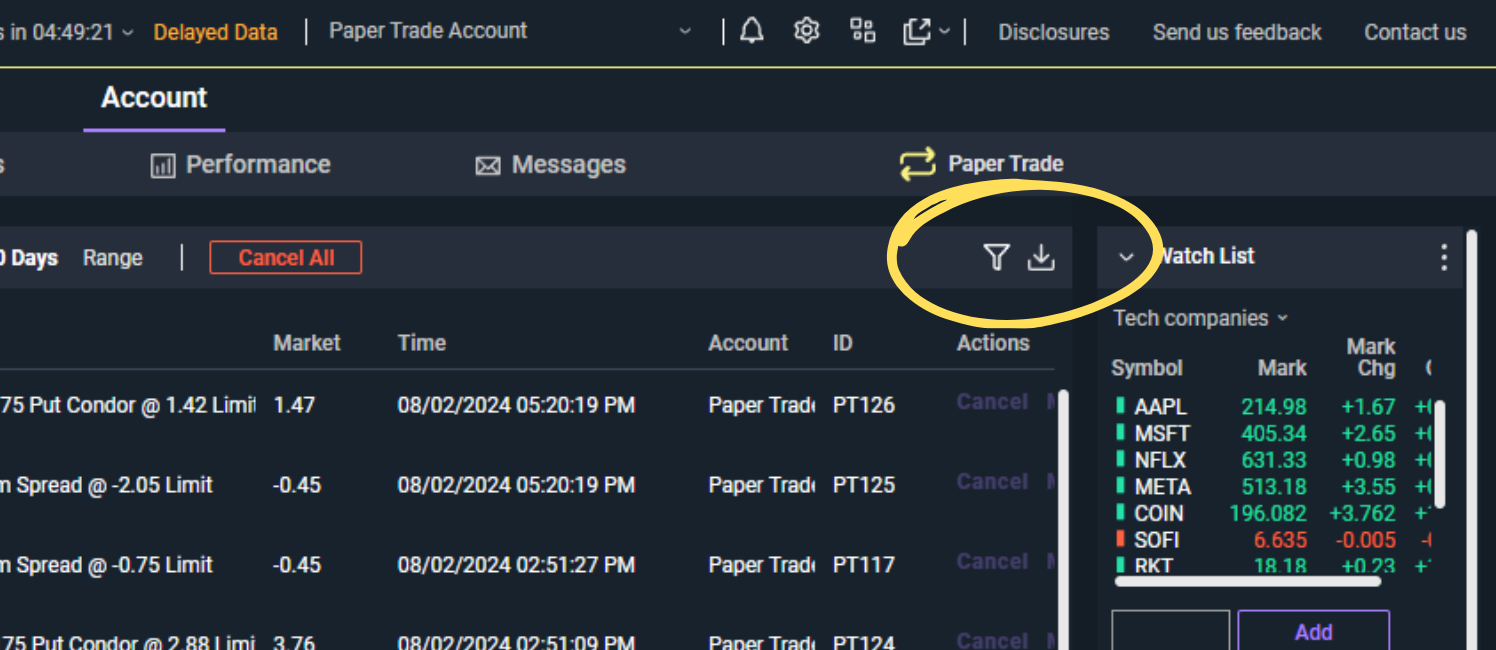
After you’ve selected the time frame and account, you’ll then export by using the download icon in the upper right hand corner of the account statement. It should download the csv file automatically to your downloads folder with all the trading activity for the time frame you selected.
Download Transactions From E*Trade Website
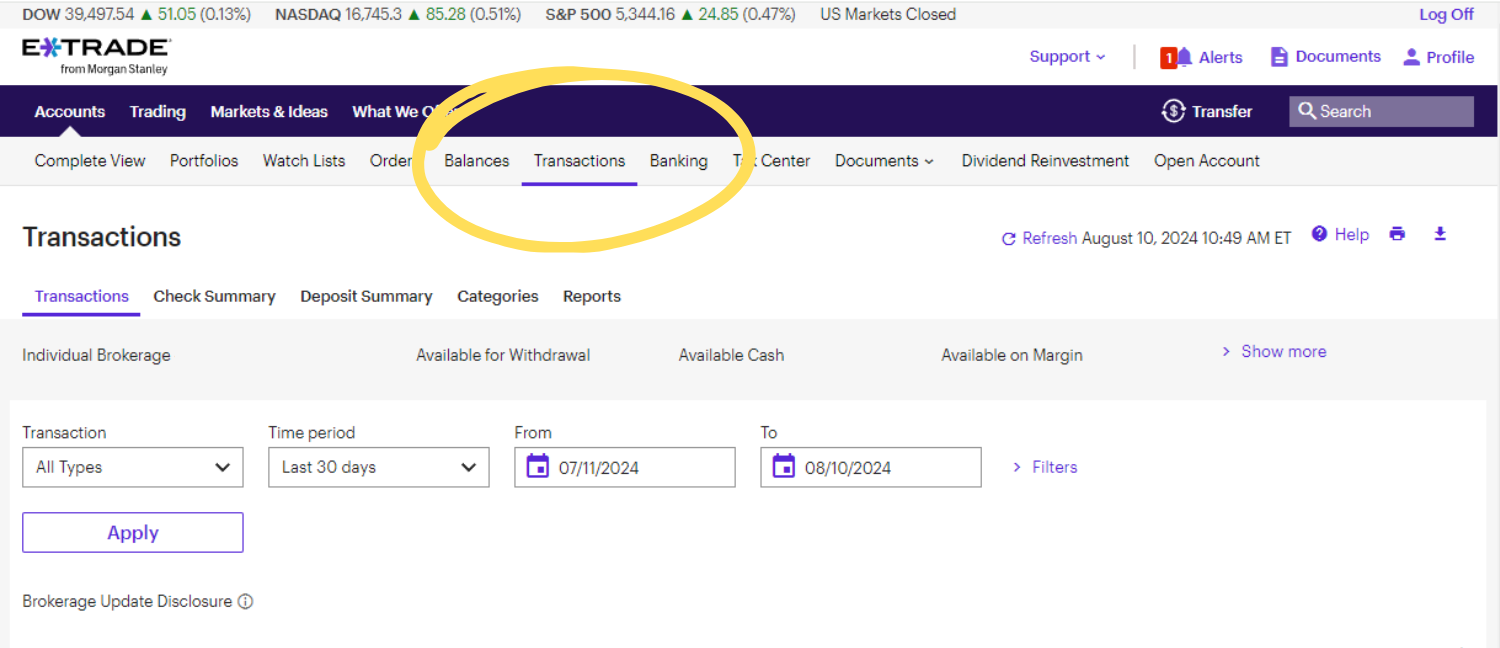
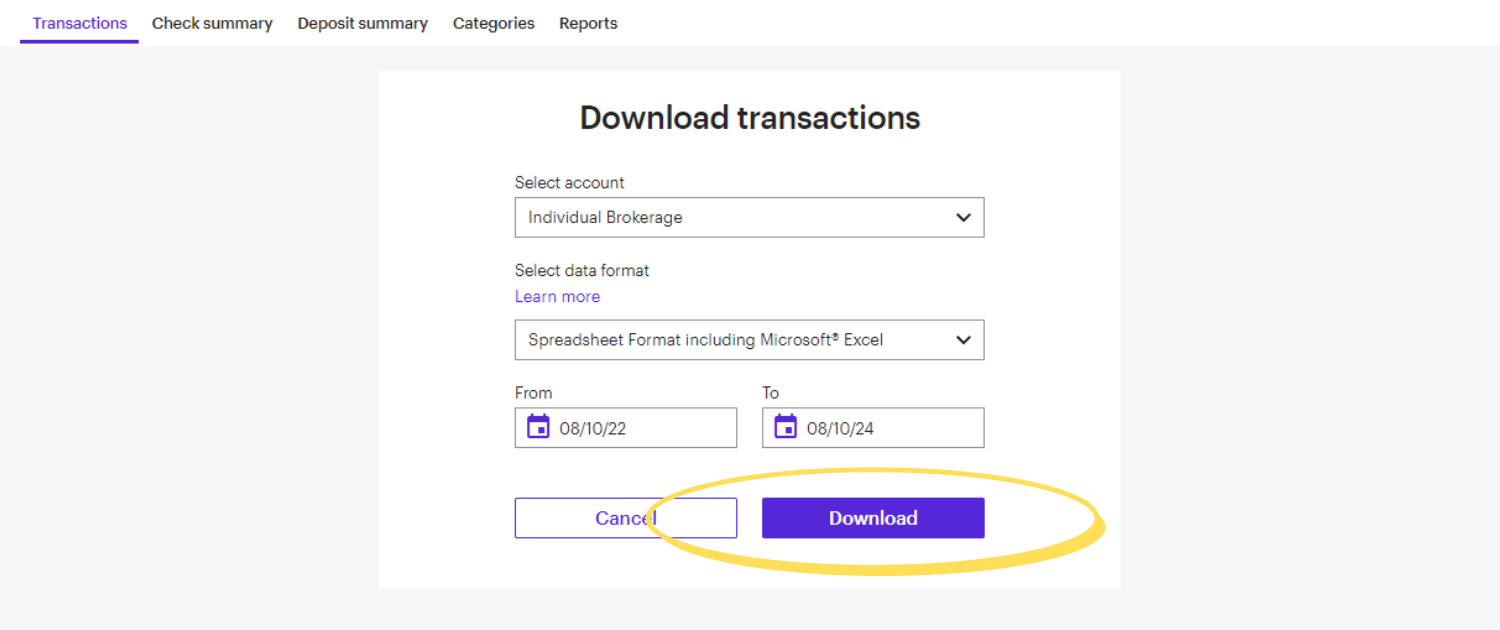
The first step to exporting your trade history on the E*TRADE website is to find the Transactions page. The Transactions page provides a detailed overview of all the activity in your account. This includes executed trades, deposits, withdrawals, and dividends.
- Log into E*TRADE: Start by opening your web browser, heading to the E*TRADE website, and logging into your account.
- Find the Accounts Tab: Once you’re logged in, look for the “Accounts” tab at the top of the page. Click on it to reveal a drop-down menu.
- Select the Transactions Page: From the drop-down menu, click on “Transactions.” This will take you to a page where all your account activity, including trades, is recorded.
Importing Your Trades into TraderLog
Now that you’ve got your trade history saved, let’s walk through how to import those trades into TraderLog. Don’t worry, the process is super simple and user-friendly.
Step 1: Clicking the ‘New Trade’ Button
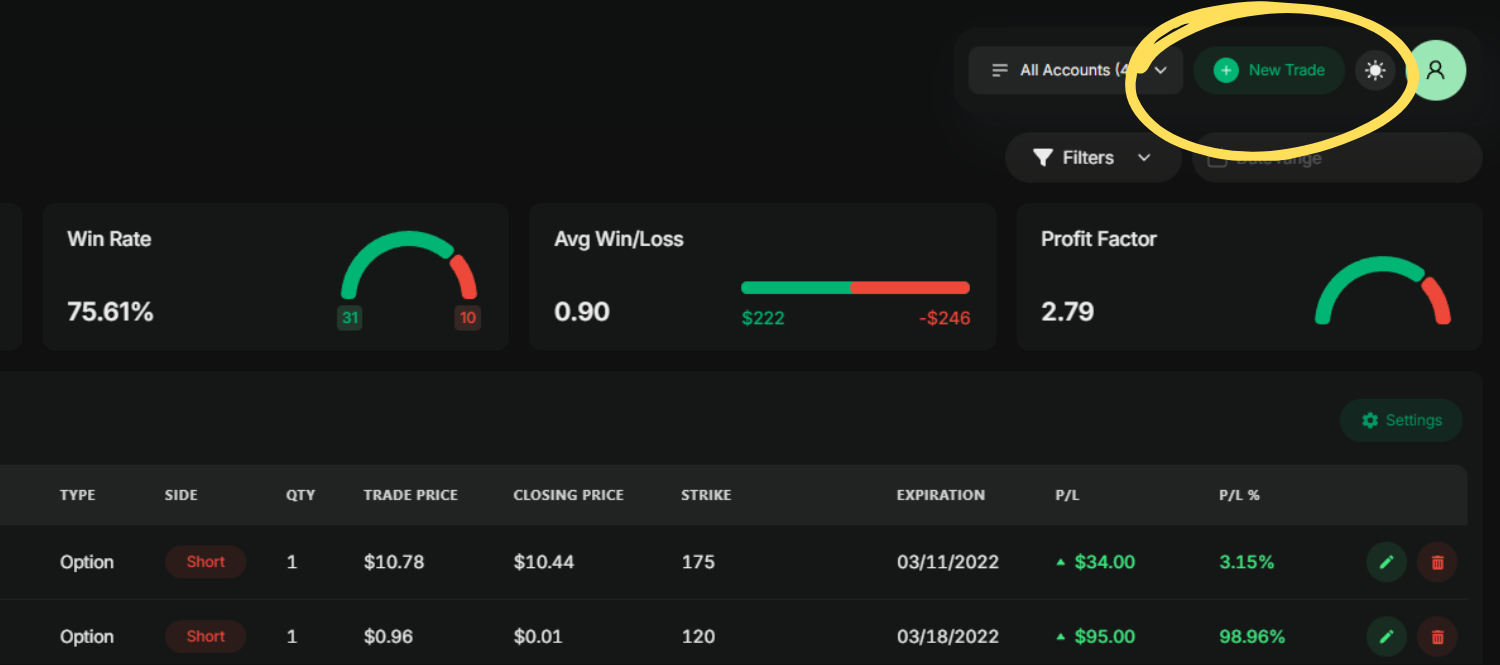
After logging into TraderLog, the first thing you’ll want to do is click the ‘New Trade’ button. You’ll find it in the top right corner of your dashboard. This is the same button you’d use if you were manually entering trades.
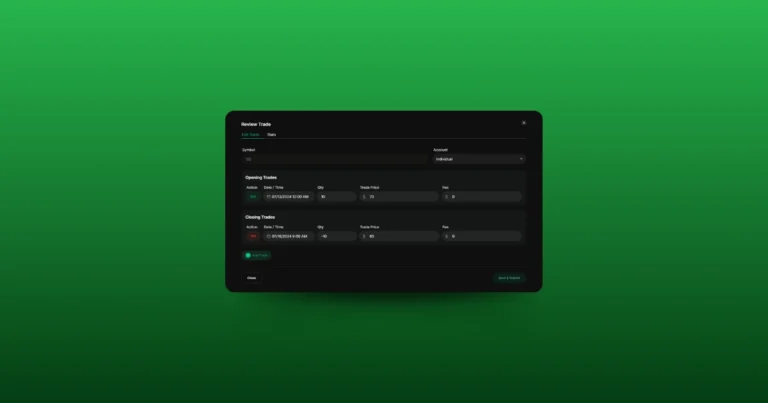
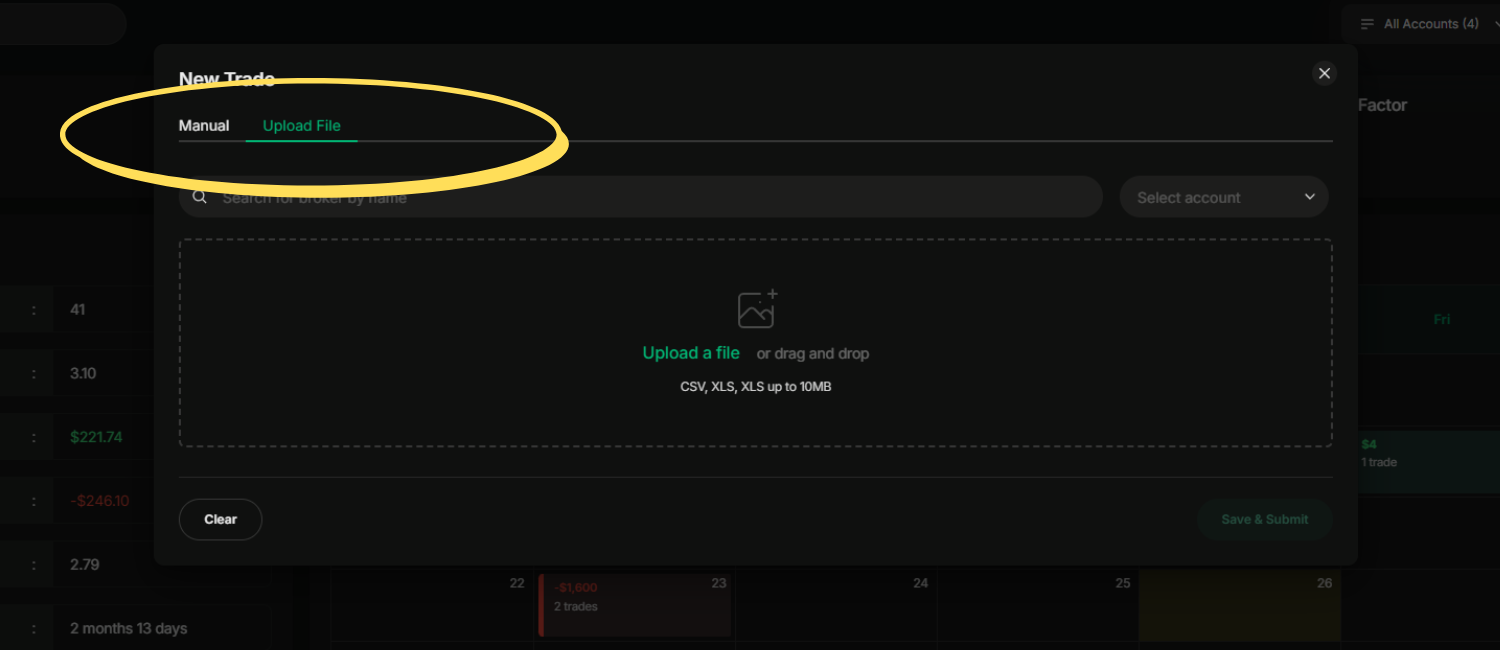
Once you click ‘New Trade,’ a new window will pop up. Here, you have two options: you can either manually input trade details or import your file. For the latter, simply find the ‘Upload File’ button in the window—this is where you’ll upload your CSV or Excel file. Go ahead and click that to continue.
Step 2: Uploading Your Trade File
In the window that pops up, you’ll see an option labeled ‘Upload File’. This is where you’ll upload your CSV or Excel file that contains your trade history. Just click that button to move forward.
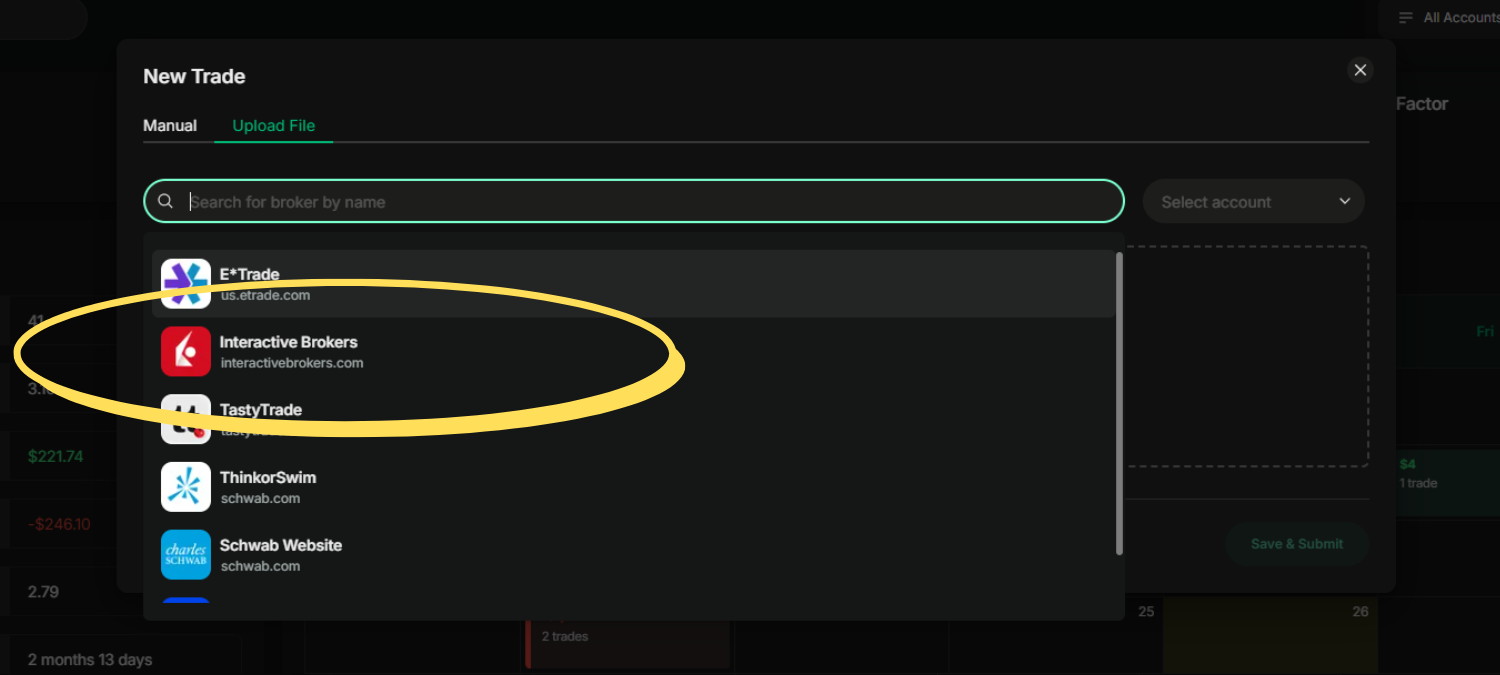
Next, you’ll be asked to select your broker from a dropdown list. TraderLog supports a bunch of brokers, so just make sure to pick the one that matches the statement you saved earlier.
If you’ve linked multiple trading accounts in TraderLog, you’ll also need to choose the correct account at this step. This ensures the trades are imported into the right account within the platform.
Step 3: Completing the Import
After you’ve selected your broker, chosen your account, and uploaded your trade file, you’re ready to finalize the process. Just hit the ‘Save & Submit’ button located in the bottom right corner of the window.
Keep in mind, the ‘Save & Submit’ button will only be clickable once all the necessary fields (broker, account, and file) are filled out. If anything is missing, the button will stay disabled—so double-check everything before hitting submit!
FAQs
1. How often can I import trades?
You can import trades as often as you’d like. There’s no limit to how frequently you upload new trade files into TraderLog.
2. Can I import trades from multiple brokers?
Yes, TraderLog supports multiple brokers, and you can import trades from different accounts into the same platform.
3. What file formats are supported for import?
TraderLog supports both CSV and Excel (XLS/XLSX) file formats for trade imports.
4. Can I edit imported trades after submission?
Yes, once your trades are imported, you can edit the trade details within the platform to make any necessary adjustments.

